Introductions:
This is a very latest global positioning
satellite(GPS) system and wireless radar/laser detector technology, supporting two kinds of languages(Russian and English), which is to
connect with GPS display screen, that provides a safety and pleasure driving
for you, let you enjoy your life fun.
Technical Parameters:
|
Sensor
|
12 million pixel CMOS sensor
|
|
Video resolution
|
1920*1080/1280*720/
|
|
Perspective
|
Front of the camera 120 degrees
|
|
LCD
|
2.4-inch TFT HD display
|
|
Video Format
|
MOV 30fps
|
|
Photo format
|
JPEG
|
|
Memory Card
|
TF 1GB-32GB.
|
|
USB interface
|
USB2.0
|
|
Operating system
|
Windows2000/me/xp/2003; Vista, Windows7
|
|
Battery capacity
|
350mAh
|
|
Charging time
|
About 2 hours
|
|
Storage consumption
|
MOV format 1080FHD: approximately 120MB / min
|
|
Weight
|
250g
|
|
Size
|
105mm*75mm*18mm
|
Full-frequency radar:
|
Main specifications
|
Band sreceiver range
|
Sensitivity
|
|
Satellite receiver frequency
|
1575.42±1.023MHz
|
95±2dB
|
|
Police X-BAND
|
10.535GHz±100
|
100±2dB
|
|
Spided K-BAND
|
24.125GHz±175MHz
|
124±2dB
|
|
Spided Ku-BAND
|
13.450GHz±125MHz
|
110±2dB
|
|
Police Ka-Band
|
34.700GHz±13000MHz
|
110±2dB
|
|
Spider Ka-BAND
|
34.300GHz±13000MHz
|
110±2dB
|
|
Laser Beam
|
940mn±33MHz
|
|
|
Anti anti VG2
|
11.150±MHZ
|
|
|
Work voltage
|
DC12V
|
|
|
Car power supply adapter
|
2VDC-36VDC
|
|
|
Work electronic current
|
200-300mA
|
|
|
USB
|
Mini2.0
|
|
|
Storage
|
32Mbit
|
|
|
Outer size
|
121*78mn
|
|
|
Work temperature range
|
(-25℃)-(+75℃)
|
|
Operating Instructions:
DVR has video pictures preview HDMI G-sensor
screensavers network cameras feature when used to select according to their
needs before using insert TF card (please use CLASS6 more genuine
original card)
1. Recording Mode
(1). When the charger is connected to work DVR
automatically turned on and start recording the blue indicator light flashes In
the recording process can be turned on / Down keys to adjust the digital zoom
press the REC button to stop recording the blue indicator light long bright
When the charger power is off automatic shutdown DVR
delayed five seconds later
(2). When the built-in battery press the power key to
boot into standby mode press the REC button to start recording
2. Preview mode
Press the Mode button to select the boot to enter the preview
mode press the Up / Down button to select the video file or photo file press
the REC button to play or pause press the mode button to exit preview mode
3. HDMI Function
Through the HDMI cable this unit is connected to the
output terminal of the TV audio and video signals can be displayed on the TV
output terminals.
4. Motion detection function
In the video settings menu <Motion Detection> key,
select <ON> start the motion detection function When there is an object
in front of the DVR movement DVR will automatically start recording when
the object stops moving stop recording automatically enter standby mode
detection
5. G-sensor function
In the recording process when the gravity acceleration
reaches the set value 2g / 4g / 6g DVR will automatically forced to save when
the segment of video file that the machine can not be removed the cycle will
not be overwritten When the G-sensor function is activated the screen has
icons
6. Screen saver function
After the System Settings Menu "screen saver"
option set the screen saver time set the button without any success in
the operation reaches the set time automatically screensaver
In the screensaver mode press any key to cancel the
screen saver
7. Charging
DVR is connected to a charger to charge the battery long
bright red LED when charging fully charged the red light goes off
8. Connecting a computer
Connect the computer with the USB cable the display on
the DVR screen: (1) Memory (2) Camera
(1). Memory: Select memory device into the U disk mode In
the U disk mode you can copy the recorded files to a computer player or cut TF
card can also be removed using a card reader to read the data on the card
(2). Camera: Select the camera the computer will be a
standard video equipment then you can use as a PC camera
9. Date Time Set
Set interface to select <Date Time> entry in the
System menu press the REC button to enter the date / time setting interface
The date and time setting interface press the REC button
to select the year month day hour minute use the Up / Down keys on the year
month day hour minute and second to adjust all the settings are completed press
the Menu key drop out
10. System Reset
If the device unusual circumstances in the course stick
with a small diameter 1MM press the reset button the system will automatically
reset.
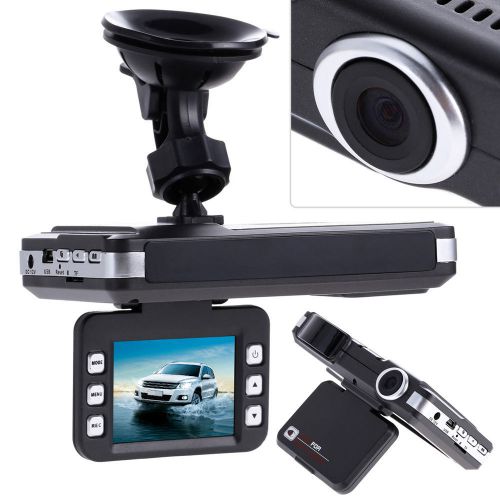


 2.4'' car lcd tft dvr camera recorder/radar laser speed detector track recorder
 Car camcorder dvr with rear camera radar sensor kit pz452
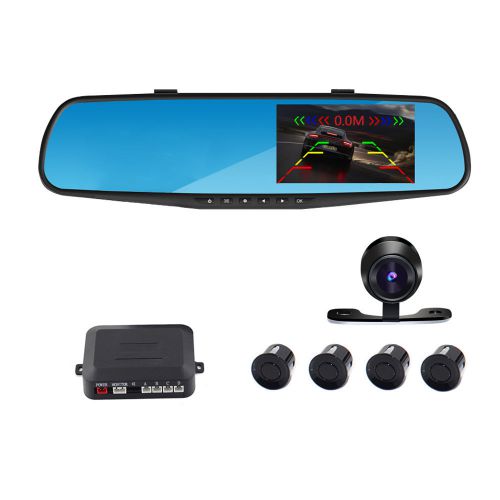 Front and rear dvr car camcorder voice report with park reverse radar pz621
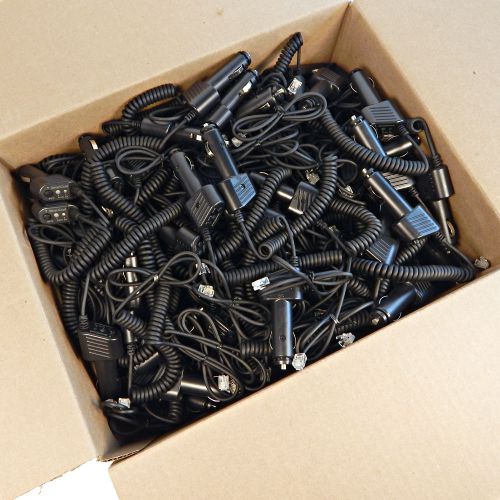 Escort/beltronics radar detector (case of 150) combo smart cords w/ blue led
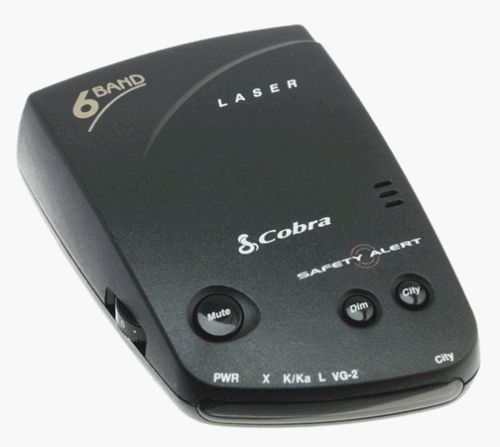 Cobra 6 band esd-6000 radar detector with car charger.
 New! cobra spx-7700 ultra-high performance radar/laser detector