YOU ARE PURCHASING AN LCD DISPLAY SERVICE.
*****YOU MUST SEND ME YOUR UNIT FOR THE REPAIR***** THIS IS A REPAIR SERVICE ONLY
RETURN FREIGHT IS INCLUDED (CONTINENTAL USA ONLY) *****INTERNATIONAL AND NON CONTINENTAL USA MUST PAY FOR RETURN SHIPPING*****
TURNAROUND IS 1 DAY FROM RECEIPT!!!!
*****YOU MUST SEND ME YOUR UNIT FOR THE REPAIR***** THIS IS A REPAIR SERVICE ONLY
********READ MY FEEDBACK AND BUY WITH CONFIDENCE********
OTHER SERVICES ARE AVAILABLE AT ADDITIONAL COSTS (I.E. LED UPGRADES ON RADIO/TAPE/CDPLAYERS, DOOR SWITCHES, DIC'S (Switches Around the Gauges), TRACTION CONTROL BUTTONS, FOG LIGHT/TRUNK SWITCHES ) CONTACT SELLER WITH A PHONE NUMBER FOR DETAILS!!!!
DETAILED REMOVAL INSTRUCTIONS ARE LISTED BELOW!! REMOVAL REQUIRES (1) PHILLIPS SCREWDRIVER, (1) #15 TORX BIT OR SCREWDRIVER, RATCHET, 10 MM SOCKET, AND A 7MM SOCKET.
*****REMOVAL INSTRUCTIONS ARE BELOW*****
TOTAL TIME TO REMOVE ENTIRE UNIT IS 15-20 MINUTES FOR A NOVICE.

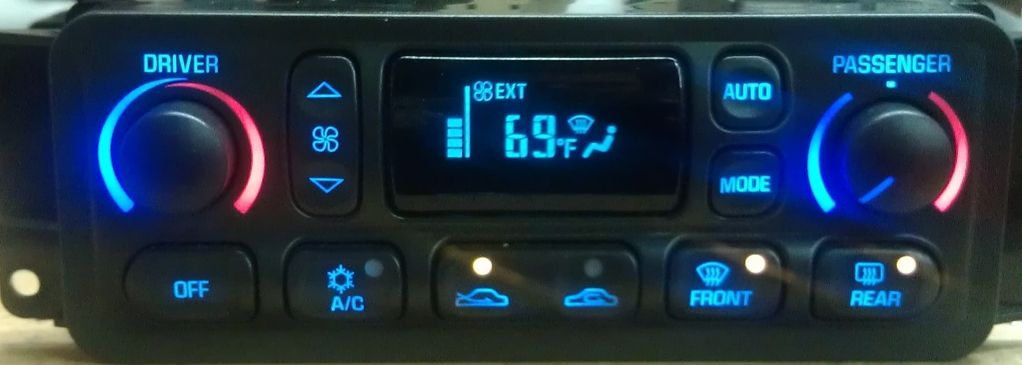
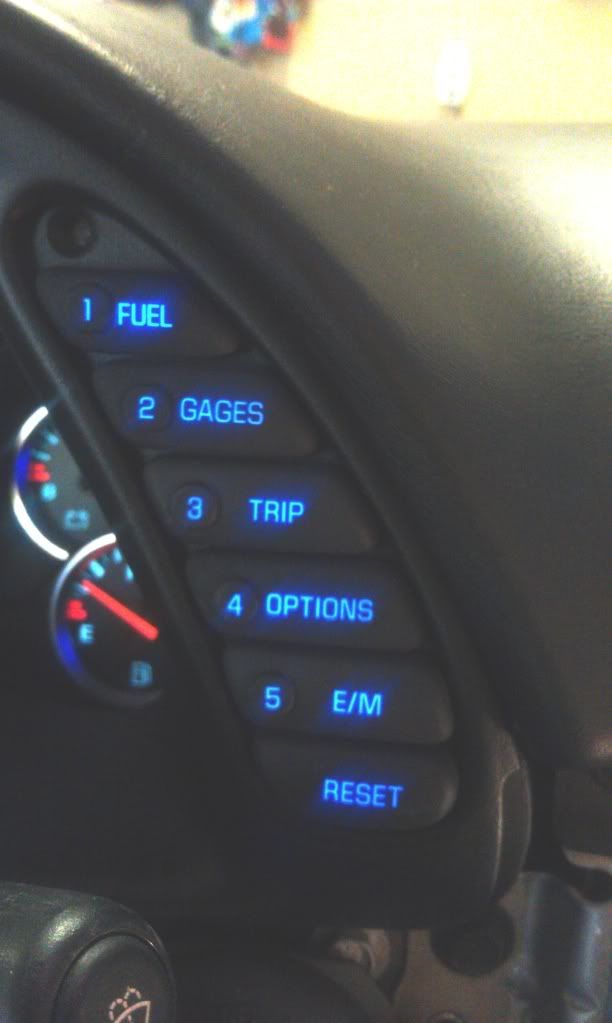
HERE IS A NICE BRIGHT DISPLAY THE WAY IT'S SUPPOSED TO LOOK
THE DISPLAY SHOULD BE THIS BRIGHT AND EASY TO READ DURING THE DAY OR NIGHT!!
HERE ARE SOME ADDITIONAL OPTIONS THAT CAN BE PURCHASED SEPARATELY!!! I ALSO DO LED UPGRADES AS YOU CAN SEE IN THE PICTURES ABOVE. *** PLEASE SEE MY OTHER AD AS THIS SERVICE IS INCLUDED IN THE LED UPGRADE SERVICE.
****** IF YOU ARE INTERESTED IN THE LED UPGRADE PLEASE DO NOT CHOOSE BOTH ADS. USE MY OTHER AUCTION SO YOU WILL PAY THE LOWEST PRICE.
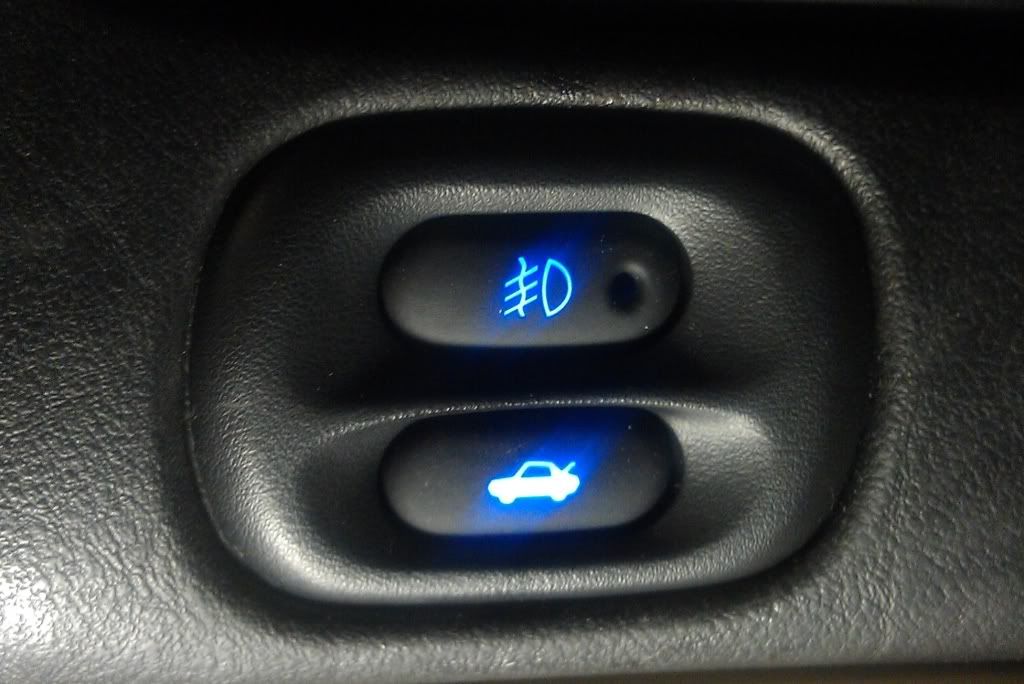
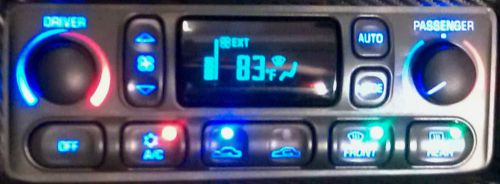
BELOW ARE SOME OTHER EXAMPLES OF THE WORK WE DO. I USED BLUE BUT YOU CAN CHOOSE FROM OTHER COLORS. YOU DECIDE!!
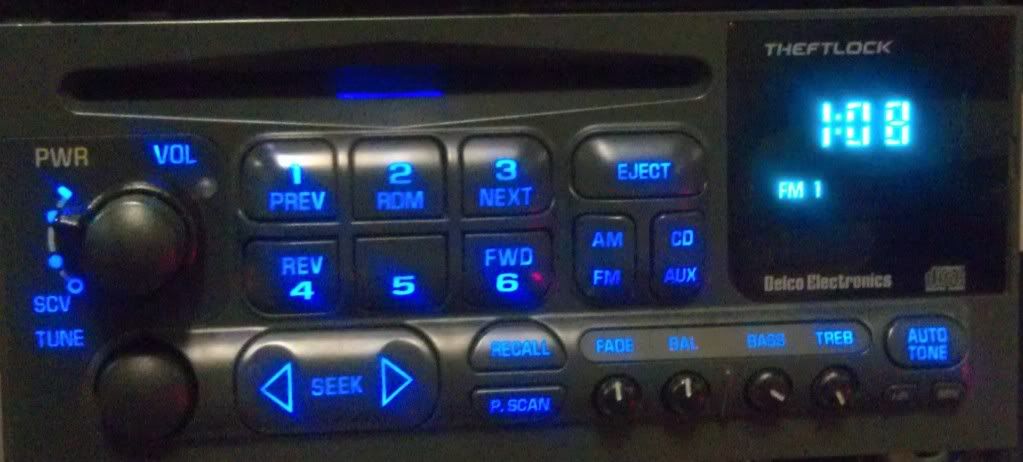
HERE IS A BOSE RADIO/CD PLAYER WITH BLUE LED'S
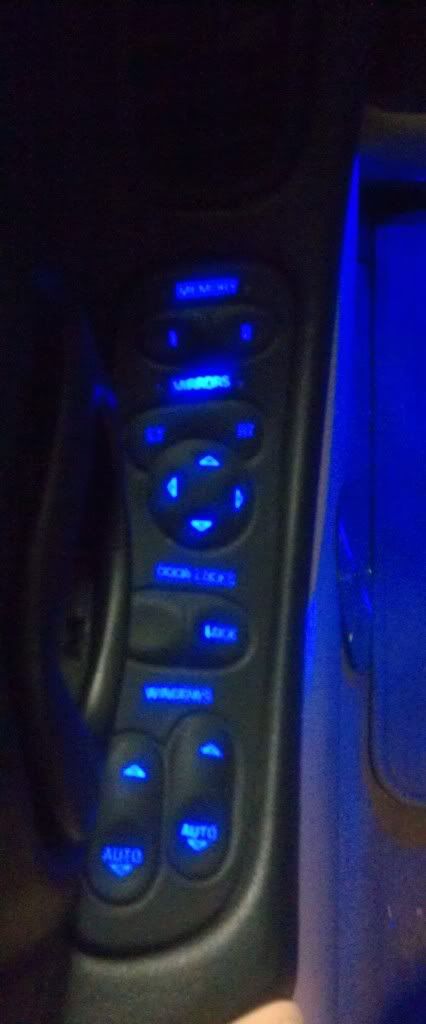
DOOR SWITCHES WITH BLUE LED'S
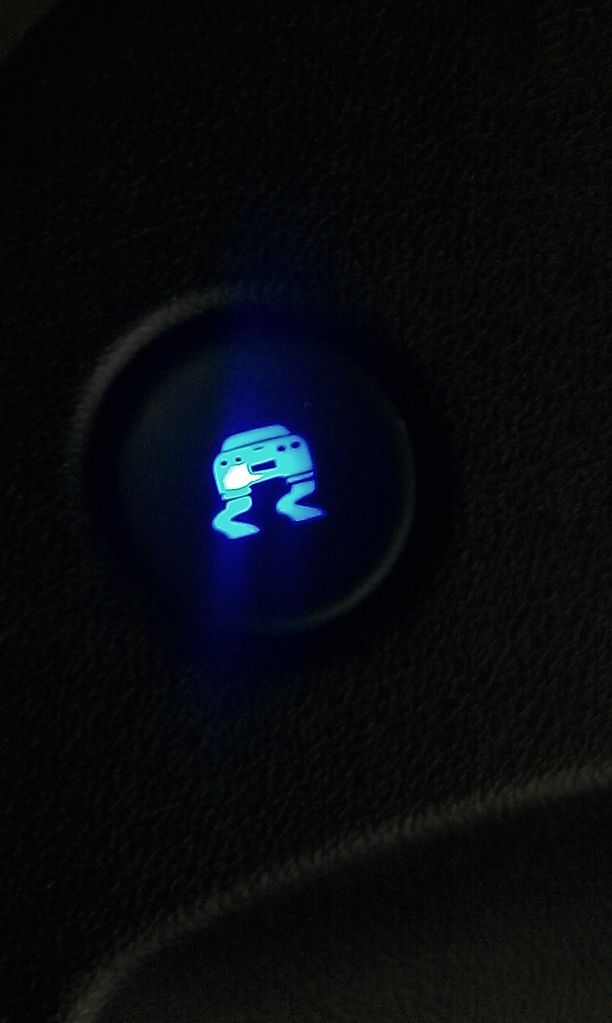
ABS/TRACTION CONTROL BUTTON WITH BLUE LED
DIC LIGHTS ( PUSHBUTTONS AROUND THE GAUGE BEZEL) AND THE TRUNK/FOGLIGHT CONTROL WITH BLUE LED'S
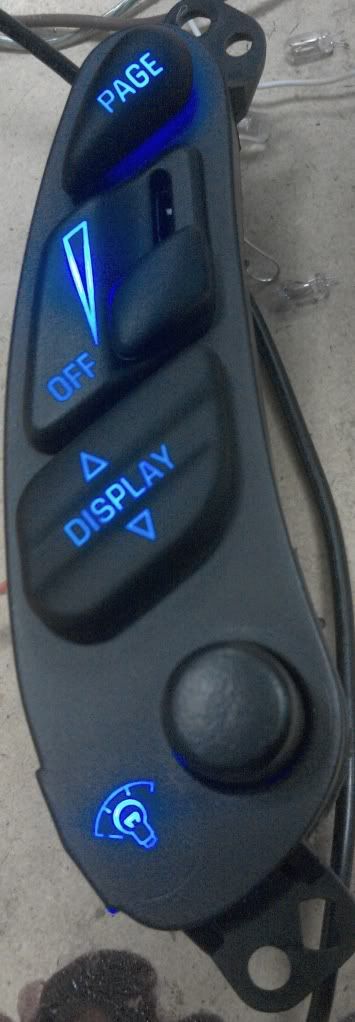
HEAD'S UP DISPLAY ON THE OTHER SIDE OF THE GAUGE BEZEL WITH BLUE LED'S
REMOVAL INSTRUCTIONS:
Here is step by step instructions to remove your A/C or Factory Radio Tape or CD Player.
You will need the following tools:
#15 torx bit
Flat Screwdriver
Philips Screwdriver
Ratchet or Nut Driver and these sockets or Nut Driver sizes
10mm socket or nut driver
7mm socket or nut driver
about 20 minutes/
First you must remove the 4 screws in the waterfall between the seats. (Convertibles ONLY...Skip down 3 lines for ALL other C5 body Styles)
This will consist of (4) 7mm hex screws OR (4) #15 torx screws
Remove the waterfall and put it up whereas not to scratch it.
Then open up the armrest between the two seats and remove the two plastic caps caps at the back of the armrest.
These caps are hiding the two 10 mm nuts. Remove the nuts and put them with the other screws.
Next lift firmly up on the traction control bezel (it just pops up) and remove the wire connected to it.
Put the bezel aside.
From where you removed the traction control you will notice another plug underneath the bezel connected to a lighter looking device at the front of your armrest. Unplug it.
Next to the plug that you just removed, you will find 2 more silver nuts holding the front of the armrest down.
Remove the two nuts and put them with the other nuts and screws.
We're about halfway home now!
Slide the armrest back but understand that there is still a wire connected that you can or don't have to remove.
It goes to the gas door. It's pretty easy to remove but not completely necessary.
If you don't remove it then simply slide the armrest back as far as the wire will let you and leave it.
Now we are going to move to the radio bezel.
Open the ashtray door and remove the ashtray. Behind it you will find a 7mm hex screw. Remove it. There is a #15 torx screw about an inch or 2 to the left of that screw. Remove that also.
Immediately to the left of the ignition switch you will see a small bezel with a grill. Pry it out from the bottom slowly and the plastic bezel will pop right out and expose a philips head screw. Remove the screw.
Now we are going to remove the radio bezel.
Pull the emergency brake handle up. (you will move this up and down as you need to)
If you have the luxury of inserting your key in the ignition and turning it to "ON" (not starting the engine) and removing the key do that now. (mine can do that). If you can't then just leave the keys in the ignition.
Step on the brake pedal and move the shifter to 1st gear (auto) or whatever gear is furthest away from the dashboard. It's time to remove the bezel completely
Above the radio are 2 tabs that face in to the dash (you can't see them until you remove the bezel). Be cautious of them. (Don't force them or they will break). This is just me letting you know what to look out for!
Now Slide the radio bezel slowly back and begin to lift the rear of the bezel. You will actually be lightly pressing down on the bezel also at the top of the radio where the tabs are. The part of the bezel that is around the ignition switch will start to move nicely also. Slide the entire piece back and over the shifter. (SHIFTER DOES NOT COME OUT)
The bezel just covers it.
The bezel has now been removed. Put it aside whereas not to scratch it.
There are 2 screws holding the A/C Climate Control in.
Remove the two screws and and remove the big plug in the back of the A/C Climate Control. Just pinch the plug and it will come out.
The radio is exactly the same procedure except you need to remove the antenna and a couple of plugs from the rear of the radio.
Wrap that little devil up nicely and send it to me with directions to EXACTLY what you want to have done to it.
PUSH THE "BUY IT NOW" OPTION ABOVE
Send the unit to:
Dave Inkeles
11790 Wildwood Springs Drive
Roswell, Ga 30075
I will take a picture of the finished product and e-mail it to you prior to sending it back.
I wrote these directions as if I were talking to a 10 year old and many of the details are a little drawn out.
The entire removal should take 20-30 minutes for a novice if you follow these directions fully.
If you are having trouble...DON'T FORCE ANYTHING...CALL ME and I'll walk you through whatever needs to be done.
Best Regards
Dave
*****YOU MUST SEND ME YOUR UNIT FOR THE REPAIR*****
THIS IS A REPAIR SERVICE ONLY
 *new* dupont 30 lb can / tank suva refrigerant r-134a *sealed* free shipping
 Interdynamics pc-1 air conditioner oil; a/c pro (r); for r-134a
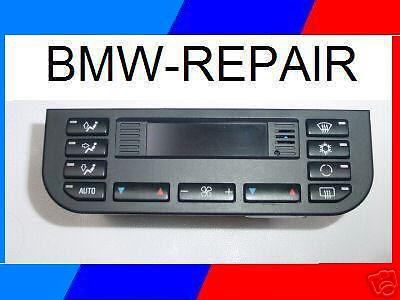 1999 bmw climate control repair rebuild e36 fix 318 323 328
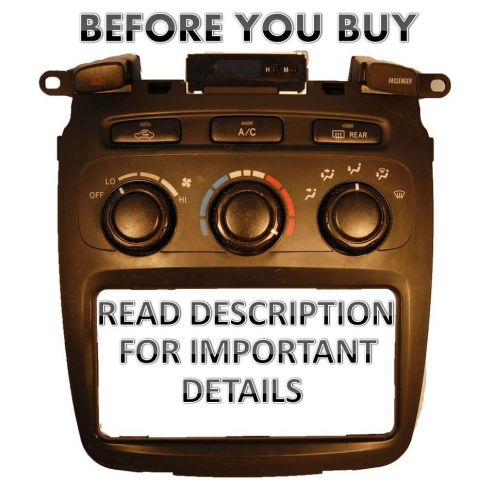 01 02 03 04 05 06 07 toyota highlander a/c heater climate control repair service
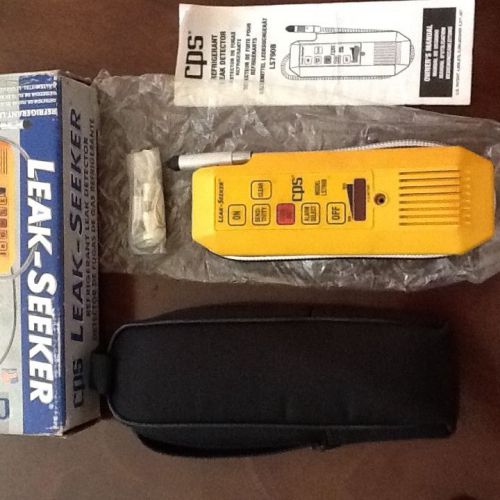 R12 and r134a deluxe leak seeker detector
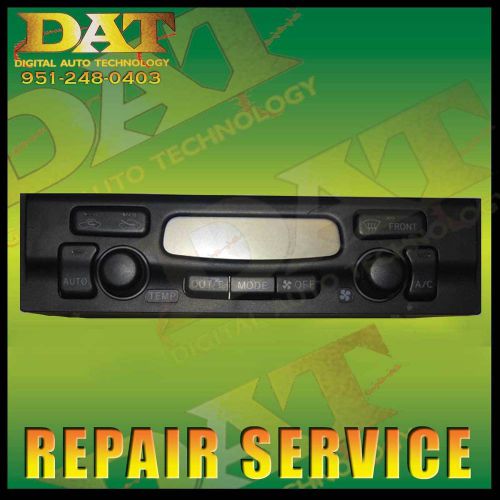 99 1999 toyota 4 runner limited digital ac climate control repair