G-tech Tesla Performance Meter / Pro W Box & Manual on 2040-parts.com
Snellville, Georgia, United States
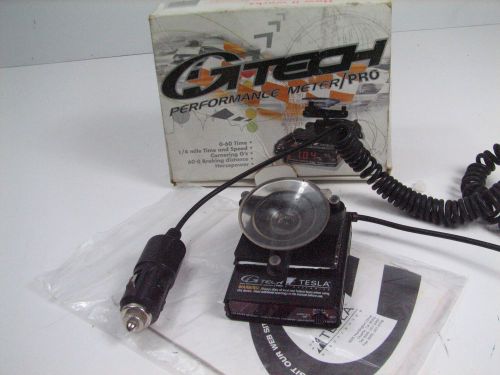
Please see all pictures. Unit power up and works as it should. FOUND ON THE INTERNET G-Tech Pro Performance Meter The G-Tech Pro Performance Meter is basically a precision accelerometer that can calculate 0-60 and 1/4 mile times, lateral and braking Gs, and horsepower. It looks a lot like a radar detector, and mounts in a similar position above the dash on the windshield. (This is not a good thing in a province where radar detectors are illegal.) The unit comes with a mounting bracket that sticks to the windshield via a suction cup. The G-Tech velcro's (or snaps, on some models) onto the mounting bracket. The bracket tilts up and down so that the G-Tech can be made as level as possible. Because the unit measures G forces, if it is not level it will "feel" the gravitational pull of the earth, skewing the results.
We were very surprised at it's quality construction, performance and accuracy. It is a relatively small unit measuring only 3 inches by 2 inches but it "feels" nice. It's molded from a dense plastic and an excellent high quality cord is attached to the unit. The 12vt cigarette lighter cord also has an integrated fuse and the unit itself has a noise capacitor, all nice quality touches. Also included is an adhesive Velcro strip, and a suction cup mount to put the unit on your windshield. What can The G-Tech pro tell you?: The above are REAL WORLD expectations, not ideal lab conditions. Internally the G-Tech is much more accurate: 1 foot for distance, 1/100th of a second for times, .1 miles per hour for speed and 1/100th of 1 G for G-forces. So this means with several averaged runs, you can get very close to "dead on" with your readings. As close as anything $10,000 worth of test gear would buy you anyway. Professional drivers use this device and many average runs for best results. Many of the performance numbers you read in all the popular auto magazines and on automotive television shows are gathered and measured by accelerometers similar to the G-Tech pro. Let's explain how this works: Calculating HP, speed, distance, Mass, and time to get performance numbers is actually a very easy equation. Let's look... Velocity (V) (or speed) is calculated by Acceleration (A) multiplied by Time (T). V=AxT. The G-Tech can calculate acceleration with it's internal accelerometer and time it calculates by it's internal clock which is automatically triggered at the launch of your stang. So it can calculate Velocity (or speed) easily. Now that you have Velocity (V) calculated you can get Distance (D) easily by just multiplying V x T. D=VxT. So now you have Acceleration, Velocity (or speed), Time, AND distance all figured out! Now how do you get Horsepower ? For horsepower you need to throw Mass (M) into the equation. Mass is the weight of your stang in pounds. Oh yes.. we forgot to tell you, the G-tech allows you to enter the weight of your stang into it ! Now that you have entered the weight of your stang into the G-tech pro, it has all the info it needs to further calculate rear wheel horsepower. The equation is: Horsepower = Velocity x Acceleration x Mass. HP=VxAxM. Now you got rear wheel horsepower !
The G-Tech measures "real" HP that takes into account drivetrain loss, wind drag on your car, any ram air / cold air systems you may have, etc. This is because your stang is actually moving down the road and not standing still on a dyno. Remember that as your speed doubles, wind drag quadruples in resistance. Also because of this your HP may show slightly less than on an actual standing still dyno. This would mean that if you improved the aerodynamics of your stang that it would actually show up as extra HP on the meter even though you did not do anything to your engine. In many forms of road racing HP is talked about and gained in this manner. As "free" HP. In this sense, if it's windy out we'd suggest a run into and out of the wind for a best averaged run. For HP calculations you only need to rev your engine and move until you reach peak HP, you can usually do this in 1st gear.
The accelerometer can also measure both positive and negative G's. This is how the unit can factor in braking distance, by applying negative input from it's accelerometer into equations during braking. The DSP chip records info 400 times per second to insure accuracy. To get right / left lateral g's you simply turn the unit sideways in your stang and drive the skidpad in either direction. The unit will over time give you your best constant g figure and stores it for push button recall. Let's look how easy it is to get your Horsepower at the rear wheels with the G-Tech pro:
It's even easier to get performance times. Just turn the G-Tech on, push the button, and go! If you are going for a 0-60, then drive until you hit 60mph and then slow down, the G-Tech will show you your time. If you are going for a 1/4 mile, then keep on going until you reach a 1/4 mile. For 60-0 braking just get your stang above 60 mph (any speed above) and start braking. The G-tech knows your speed and will only measure your 60-0 stopping distance! You don't need to know how far a 1/4 mile is either, the G-tech will let you know when you've hit it and give you your speed in mph and your trap time! The G-tech automatically stores and shows you your results after each run. Operation is totally automatic. You just drive and it gives you your performance numbers! The unit performed extremely well for us. With only an accurate weight input of your stang, a fairly flat level surface to drive on, and a proper placement of the G-tech in your stang, you can expect very accurate results especially after several averaged runs in your stang. Keep in mind that there are MANY factors that influence performance, engine temp, oil viscosity, wind, fuel, humidity, air temperature, driver skill, etc. Don't be surprised if your runs vary by up to 10% each time when doing runs one after the other or on colder days, hot days, etc. Using the G-Tech, it would be best to use the same patch of road as well for your tests or a flat level surface each time. IMPORTANT NOTE: Don't go out on a busy street and start doing 1/4 mile runs. Find a closed area to do your tests. Use common sense and keep the streets safe.  inkFrog Analytics |


Gauges for Sale
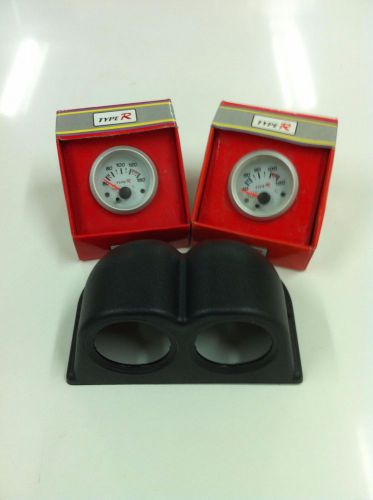 Best 2 racing car auto guage brand type r water & oil temp & double pod holder(US $100.00)
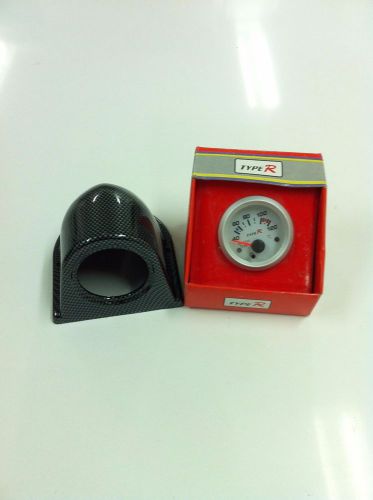 Best new racing auto guage brand type r water temp or oil temp & 1 pod holder(US $50.00)
 Auto meter 4905 ultra-lite ii 2-1/16" mechanical boost gauge new(US $65.00)
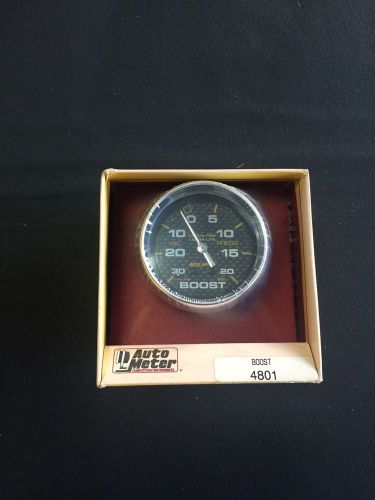 Auto meter 4801 carbon fiber dial mechanical boost/vacuum gauge new(US $79.00)
 Auto meter 2620 z series air pressure gauge new(US $50.00)
 Auto meter 3574 sport-comp 2-5/8" nitrous pressure gauge electrical new(US $175.00)
Bugatti Veyron Hire – only £16k a day!
Wed, 10 Jun 2009Fancy driving a Veyron for the day? That'll be £16k! Or you could toddle off to Jack Barclay in London and see if they’ll let you borrow their new Bugatti Veyron L’Edition Centenaire for the weekend.
Ford Mondeo new engines – detail and prices
Sat, 12 Jun 2010The 2010 Ford Mondeo - new engines and a new 'box Back in February, in the run-up to this year’s Geneva Motor Show, Ford let us know that it was planning on fitting new engines to the Mondeo for 2010, including the new 2.0 litre turbo EcoBoost. And now we have full details – and the prices. The 2.0 litre EcoBoost boasts advanced combustion enabling it to offer more power for less emissions – and more frugally.
Bentley Crossover and Sport Hatch/Estate planned
Wed, 25 Nov 2009Bentley are planning an 'Allroad' Estate type car and a two-door Shooting Brake hatch These rumours crop up from time to time – new entry-level models from prestige car makers – but perhaps we need to take some of them a bit more seriously now the world seems to be on a down-sizing path. So we thought it worth at least giving a nod to the rumour that Bentley are planning a pair of entry-level models to slot in below the Continental – in the £70k bracket. Especially as they come from the pen of Georg Kacher, a well-connected and well-respected car journo.