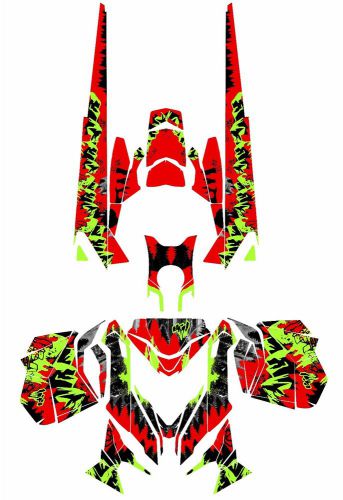
Ski-doo Rev Xm Snowmobile Sled Graphics Kit Wrap Poddubko Decals on 2040-parts.com
Omsk, Omskaya, Russian Federation
|
SKI-DOO Rev XM Snowmobile Graphic Kit, Ski-Doo Sled Decals 2012-2016 SUMMIT, FREERIDE
PLEASE READ ALL OUR TERMS BEFORE YOU BUY
PAYMENT OPTIONS
SHIPPING INFORMATION
1) RECEIVE YOUR ITEMS IN THE MAIL The first thing that needs to be done after you receive your wrap in the mail is to remove the wrap pieces from it’s shipping tube and lay out the material so that it may rest for 12 – 24 hours. In that time, please make sure that your snowmobile is in a warm location. Optimal installation temperature is 70 degrees. 2) CLEANING THE MACHINE Next, you can choose to leave the existing decals on the machine or remove them with a heat gun. However, make sure that the sled does not have any residue left on it after removal. We recommend using 70/30 Isopropyl alcohol to remove any abrasive substance, dirt or grime. This can be found at any hardware store. 3) INSTALLING THE DECALS When the time arrives to install, our best recommendation is to cut each specific piece out of the large print template so the backing material is still on the decals. This will provide you with the ability to lay these pieces out on the hood/side panels to align properly. Use masking tape to secure each piece temporarily so that you can align every piece on hood/side panels. 4) ADD PIECES TOGETHER Once you have all of the
pieces temporarily aligned, take a long piece of masking tape and stick it in
the center of each piece and to the hood/side panel areas. This long
piece will act as a hinge for proper installation. Once that is set,
remove the backing material from one side (50%) of the decal and cut it
away. Then, work the individual piece onto the area going from center
-> outward. This will help eliminate any air bubbles and insure proper
adhesion. Once one half of the decal is set, remove other half of backing material and properly lay on that half. 5) RECOMMENDATION Another recommendation
is to have an ample heat source at your disposal such as a heat gun or blow
dryer. You will find that the material is much easier to work with once
it is slightly heated up. However, remember to not get it hot, just warm. Soap and water is okay, although you must ensure the decals have dried completely before exposing to cold weather (24-48 hours recommended). 6) POST HEAT It is critical when
installing to ensure any and all air or water from wet applications is
completely dissolved and dry before exposing to winter temperatures. Regardless of your
install technique post heating surfaces and applying extra pressure is also
highly recommended for avoiding premature release. Lack of post heating all
surfaces would constitute as improper installation. |
Decals & Stickers for Sale
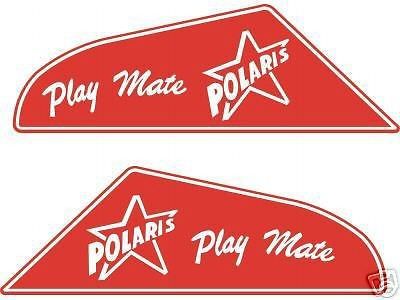 Polaris playmate snowmobile decal kit(US $10.00)
 Polaris tx txl snowmobile decal kit(US $14.00)
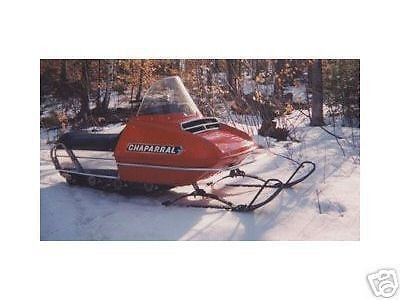 1971 chaparral snowmobile decal kit(US $30.00)
 Yamaha srx 440 snowmobile decal kit(US $48.00)
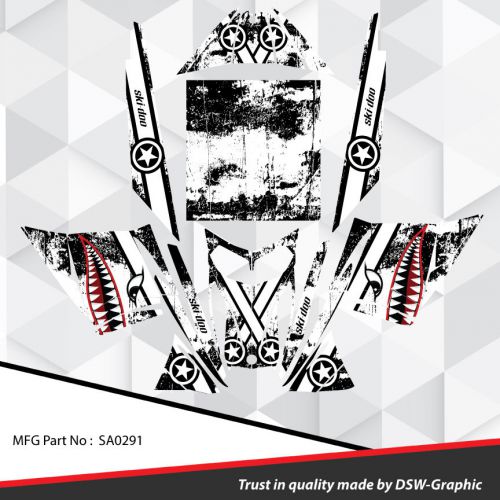 Sled wrap graphics kit decal stickers ski-doo rev mxz snowmobile 03-07 sa0291(US $169.99)
 Hmk snowmobiling sticker decal snowmobile(US $3.75)
Magazine names Ford's Alan Mulally top CEO
Tue, 28 Jun 2011Ford Motor Co. CEO Alan Mulally has been named CEO of the Year by Chief Executive magazine. What set Mulally apart, according to the selection committee, was not only leading the turnaround of an American icon without the government bailout funds given to its competitors, but also a mix of other behaviors and accomplishments.
Nissan NV200 London taxi unveiled
Mon, 06 Aug 2012Nissan has revealed a new London taxi, dubbed the ‘NV200 London Taxi', following the compact van's selection as New York City's Taxi of Tomorrow. It promises to be just as controversial in the UK as it is Stateside. The NV200, which measures in at 1,860mm high, 4,440mm long and 2,100mm wide, seats five passengers with three on a rear bench and two rear facing fold down seats while the removal of the front passenger seat increases luggage space, much in the same way as the traditional London taxi.
Bentley Continental GT3-R with 572 bhp V8 revealed
Tue, 17 Jun 2014The Bentley Continental GT3-R arrives with a 572 bhp V8 As we reported last week, it looks like Bentley has decided to do a V8 take on the original Continental Supersports with the arrival of the Bentley Continental GT3-R, a lighter, more powerful Continental V8. Just like the original Continental Supersports, the Continental GT3-R loses its back seats and goes on a diet (down 100 kg on the V8S) and gets a retuned version of the 4.0 litre twin-turbo V8 producing 572 bhp and 516 lb/ft of torque together with shorter gearing to deliver a 0-60 mph in just 3.6 seconds (0-62mph in 3.8s). The GT3-R still comes with Bentley’s four wheel drive, but it gets torque vectoring too and a modified ESC and a chassis tuned for outright cornering ability to make the GT3-R Bentley’s most dynamic road car to date.